You will need to create all the separate files before you can import anything.
Note!
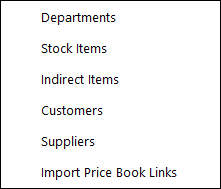
Promotions are not listed in the Utilities > Import Data menu.
If you need to import Promotions, refer to the Promotions page for further information.
Go to Utilities > Import Data > Select the type of data you want to import.
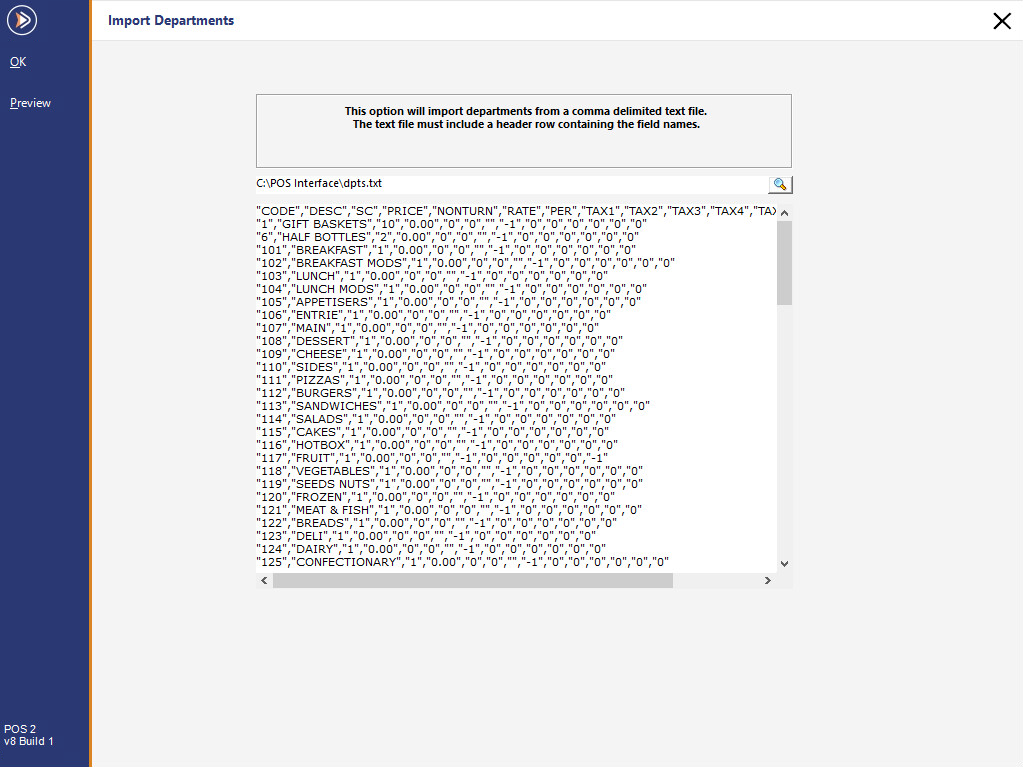
When you have made your selection, a screen will open.
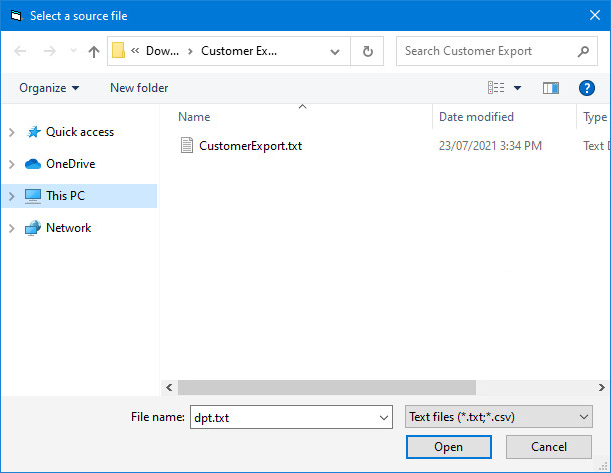
To search and select the file you want to import, press the magnifying glass icon next to the path field.

The Select a source file window will be displayed. Browse to the location containing the file you want to use, select the file, then press "Open".
The window will default to displaying any files that have a file extension of either .txt or .csv.
Once a file has been selected, a preview of the items you are about to import will be displayed.
If you manually type in the file location, you will need to press ‘Preview’ to view the items.
Once your selection has been made, click OK to start importing items.
Information regarding CODE/Starting Stock Code/Starting Customer Code
When importing Stock Items or Customers via the Import function, there are two methods that can be used for assigning CODES to the Imported Items/Customers.


Once you have clicked 'OK', a progress bar will display the status of the import.
The time it takes to import will depend on the size of the file and performance capabilities of the PC.

A summary of the import will be displayed showing you the new, modified or failed items.

Any Modified or Failed records will be recorded in the Import Error file which is located in the LOGS folder (typically located in C:\ProgramData\Idealpos Solutions\Idealpos\LOGS\).
